Midterm: Unicorn Robot Blog
- ffatima1
- Mar 8, 2022
- 5 min read
Updated: Mar 17, 2022

I started with the idea of some cartoon character or robot that would have some characteristics that we learned in class. Like a light, button, sensors, and music. I wanted to build a character with some expressions while also keeping the structure of the micro bit and breadboard hidden. The toughest part for me was coming to the conclusion of how it would interact with other people? and this would answer what really comes out as an interactive robot or a robot with its own expressions and responses.

I constructed my first model with a piece of paper and I tried adding facial expressions to its movements and was not able to execute it perfectly but I came to the conclusion that it will be a unicorn with some features. It was hard for me to change the facial expressions of the paper character because it used harsh rotations without using lighter hand movements to change its expressions and I figured that rotation would break the fragile body of the robot. I have attached the image of the first attempt on the left.

After I tested the rotation again in class, I came to the conclusion that it was going to break the model while testing. Also, I got a new micro bit because the older one stopped working, and I got a new micro bit from the professor.

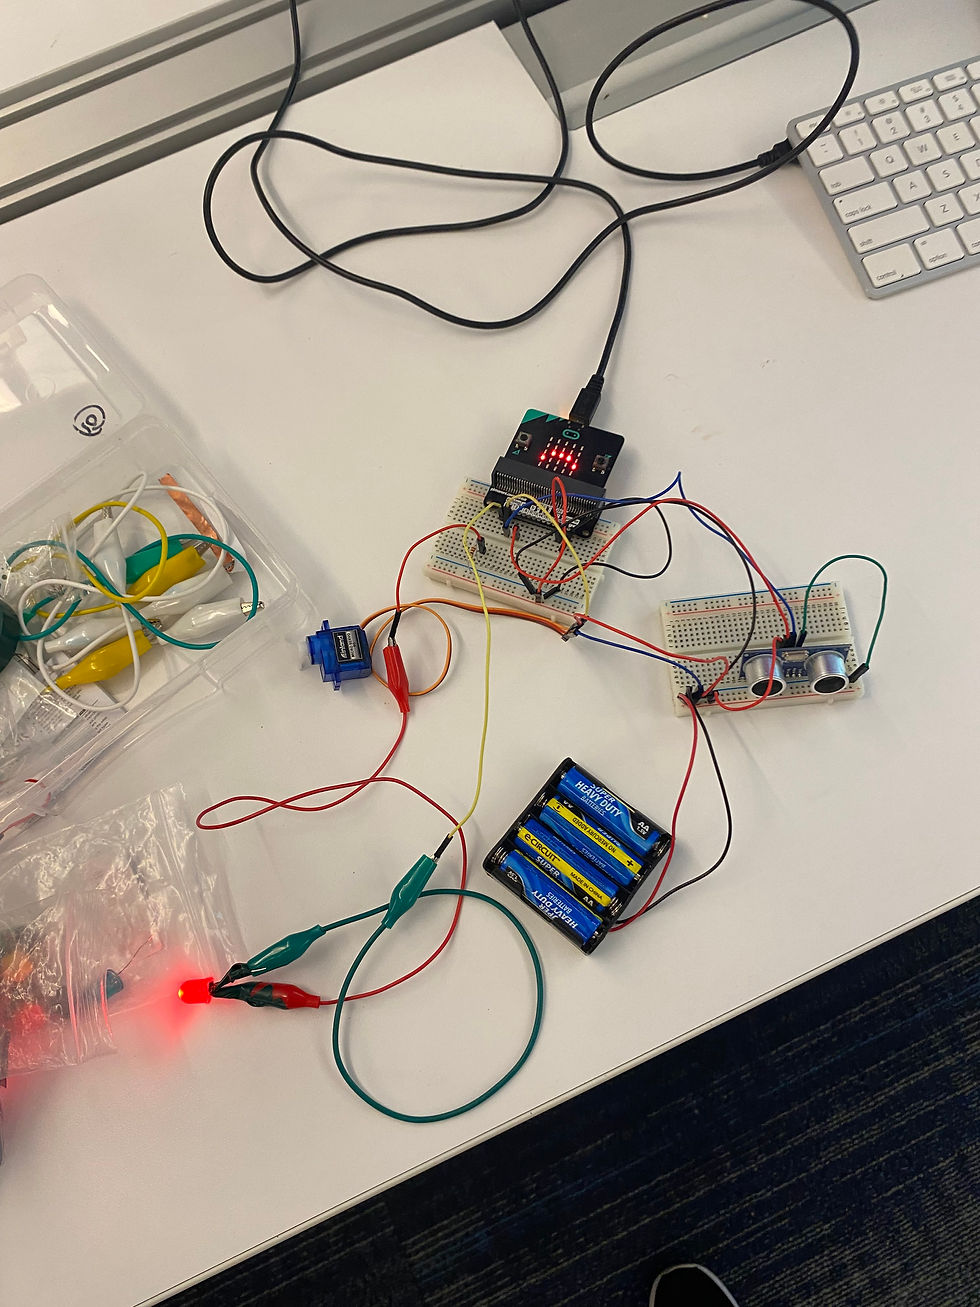
In the second attempt for the model, I made the structure with cardboard and I used boxes to construct the head and body and cut out the face mouth area to fit the micro bit. I experimented with cardboard and it solved the issue and made the structure more strong and more solid. Then I added some more color to it with pink and green crepe paper. Attached the micro bit and opened the new micro bit but after attaching it to my laptop the light was not turning on nor appearing on my laptop so I was not able to run my code even after getting the new microbot. I later tested it in class and the micro bit was working and got the idea of adding interactivity using an ultrasound range finder. I created a sensor to change the mood of my pet. The closest range gives a sad face, the distance in the middle range gives a confused look, and once your far it smiles. These expressions are displayed on the micro bit and the micro bit is adjusted inside the face of the unicorn. Then I constructed an LED for the unicorn's head to complete the look.
Later, I worked on my code and I used two crocodile wires and clipped one of the ends to the led and the other to the breadboard. Then the Professor provided me with non-conductive tape, which I used tape to prevent the two ends of the LED and crocodile pins to touch. I covered them in tape and then adjusted them into the head with tape.
The bottom right image is the head of the robot that I made for the third model after completing the wiring in class. I used the box of the new micro bit that I previously mentioned in the blog and used it to cut out the new head. The size was perfect for the robot and I collected other boxes throughout the month to construct the other part of the body.
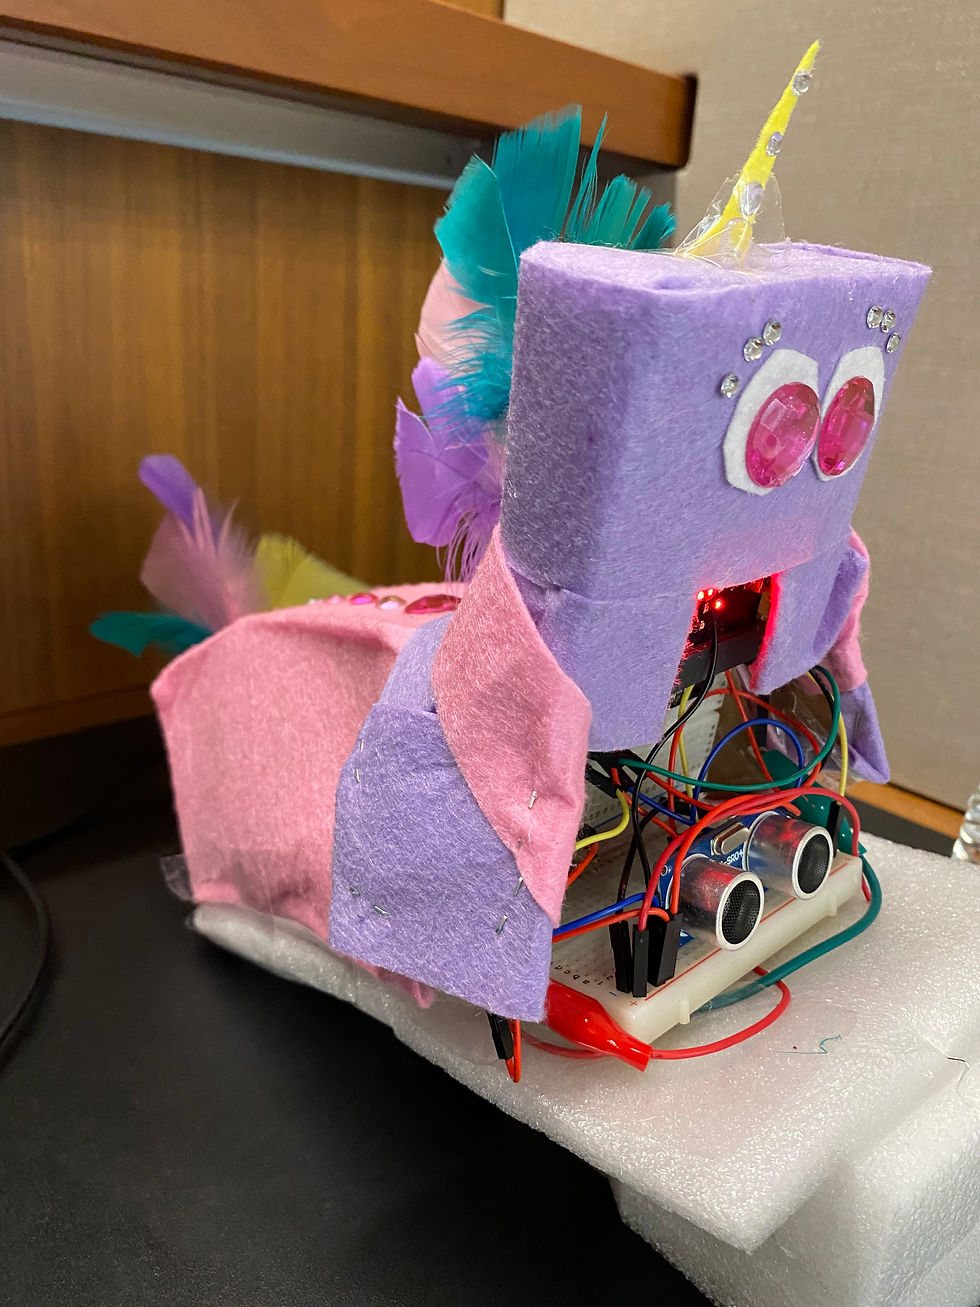
I later upgraded the structure by buying felt sheets to make the skin of the unicorn have more texture, added some sparkle to the structure with rhinestone stickers and feathers for the tail and hair of the unicorn. I had gained more experience with working with the materials like cardboard so it was manageable to get the body shape as close to a unicorn as possible.


I also learned how to use a micro servo to move something in rotation. For my second step, I experimented with a tail rotation for the unicorn to add movement to its happy emotion. I later taped the tail in the inside of the robot and created a rotating tail.

I then attached fur to the tail and experimented with the movement as the user stands away from the robot it gives happy facial smiles, turns on the unicorn headlight, and also spins the tail to represent a happy emotion. The second facial expression is confused and blank as you are standing in the middle range and the closer you get it gives a sad face. Both the sad and confused face given by the unicorn does not include the light turning on or tail movement. I have linked my finalized code here: https://makecode.microbit.org/_X2RH8W3q7Yr5.
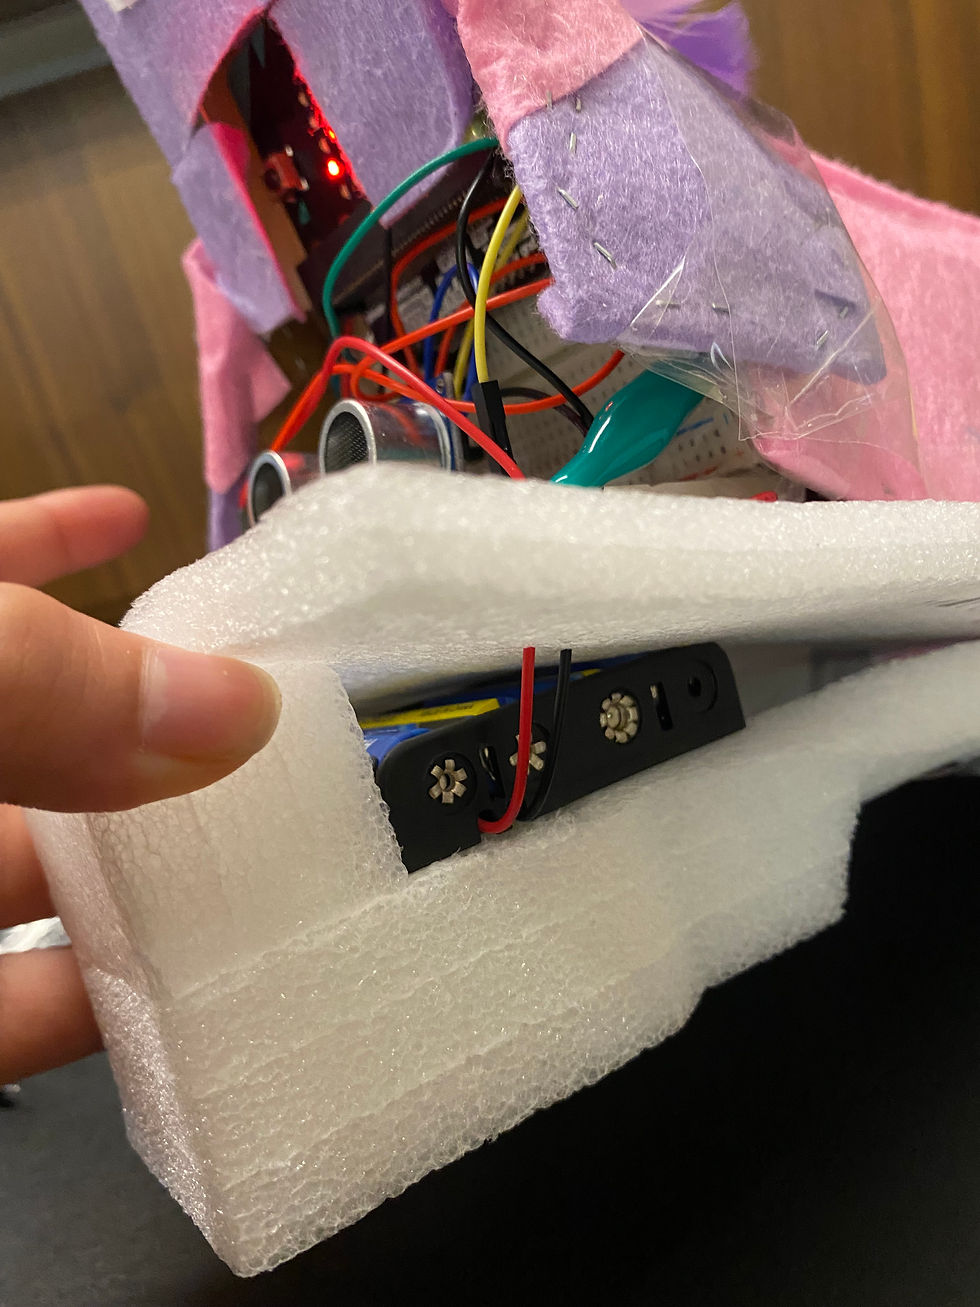
I then figured out ways to hide the battery pack, the wires, without ruining the shape of the unicorn robot. So, I made a little foam stand at the bottom that hides the battery pack as well as gives more height and structure to the project.
The structure came out really cute with the sparkle, fur, and also the robot unicorn's horn aligned beautifully with the led, by making the unicorn look brighter. I also added feathers for the head hair and the tail to add character. I also did not want to go overboard with fur, because the weight would have affected the movement, and also I only attached it with tape so it is removable and rotatable by the servo motor.
The next step was that I experimented for multiple days. The only issue I faces was that the tail and LED would not move at the same time when the robot was happy. Due to the type of flow in the breadboard, the tail would not work if the LED was wired at the same time. I changed pins and wired it multiple times from the start and replaced batteries, but the movements were not uniform. I noticed that when I would take out the wire of my LEDs, the tail would move, otherwise, it would not make any rotation at all. I also borrowed a new servo motor to see if it was not working, but that was not the case. Changing the servo motor, partially helped but it did not fully solve the issue of the flow. I recorded multiple videos of testing the robot and I have attached them here:
This video shows the facial expression and headlight work perfectly according to the code and wiring.
This video shows how the servo motor reacts when the led wire is partially plugged and it gives a continuous rotation. It spins continuously and the led stops working.
This video also shows that the servo motor tail movement works but it disturbs the electric flow of the led, therefore the led flashes. The facial reads also work perfectly and change with the amount of distance.
After testing the unicorn I added some final touches by adding grass to cover the foam at the bottom and transferring my unicorn into Unicron land and also covering the wires with more felt paper. I had to cover the wires carefully so I can open the front to adjust wires as well as cut out the space of the servo motor to catch the signals of the user. Therefore, I completed my unicorn after constant experimentations and different body constructions. Overall, it was a fun and creative project, through which I learned more about wiring, servo motors, and ultrasound range finders. These tasks helped me construct an interactive robot Unicorn, with fun characteristics that are cute and user interactive.


Comments